Sprintray Pro2
Sprintray released its new flagship general dental 3D printer, the Pro2, back in 2024 with much humdrum and self-praise. Boasting a custom-built light source (modified LCD) that is easily replaceable, a sturdier frame and greatly improved precision and accuracy over its predecessors, on paper it sounds like the penultimate chairside 3D printer for practices that want to take digital dentistry seriously. However, does it live up to the hype?

This is a personal and individual opinion on the Sprintray Pro2. Sprintray nor any of its global distributors have not been involved in the writing or editing of this piece and have not restricted any conclusions made by myself of this product.
Notable features
- Relatively small physical footprint
- Combines the comfortable platform size of the 95S with even better precision and accuracy than the 55S
- Easy physical set up
- Whisper quiet operation that allows chairside operation
- Heated vat and build platform
- Very pricey accessories which do improve workflow
- Closed resin library (for the time being)
- Cloud-based slicer that isn’t always reliable with respect to object orientation and support generation
- Excellent industry-leading workflow with the ProWashS and NanoCure
Basics
| Printer size | 38 x 45 x 53 cm |
| Weight | 200 bananas* |
| Technology | Custom LCD |
| Print volume | Std plate: 10.5 x 5.9 x 19cm Arch plate: 10.5 x 5.9 x 7.5cm |
| Slicer | RayWare Cloud |
| XY resolution | 35 µm |
| Price guide | US$10,000 |
* 1 banana = 0.15kg
Set up
Setting up the Pro2 is very easy and it is as “plug-and-play” as you can get. Just keep in mind that it is noticeably heavier than the ProS line printers, so existing Sprintray users may be caught a little off-guard.
Levelling is factory-performed and hopefully should never need touching as to alter this setting requires external tech support. The touchscreen is nicely positioned and sized and easy to navigate.
Keep your phone handy – you will need to create a Sprintray account to log into the printer, which involves scanning a QR code.
In fact, the whole printer ecosystem functions at its best when its connected online, so make sure your premise has stable internet access.
All Sprintray printers utilize an easy slot-in mechanism when inserting vats – the great thing is that new standard vats come with a silicon lid which should not crack/break down over time – just one of the small lifestyle improvements Sprintray has included in the Pro2 (the lid handle is an excellent bonus and deserves brownie points).
My overall set-up experience was overwhelmingly pleasant but just keep in mind, this is coming from an experienced user.
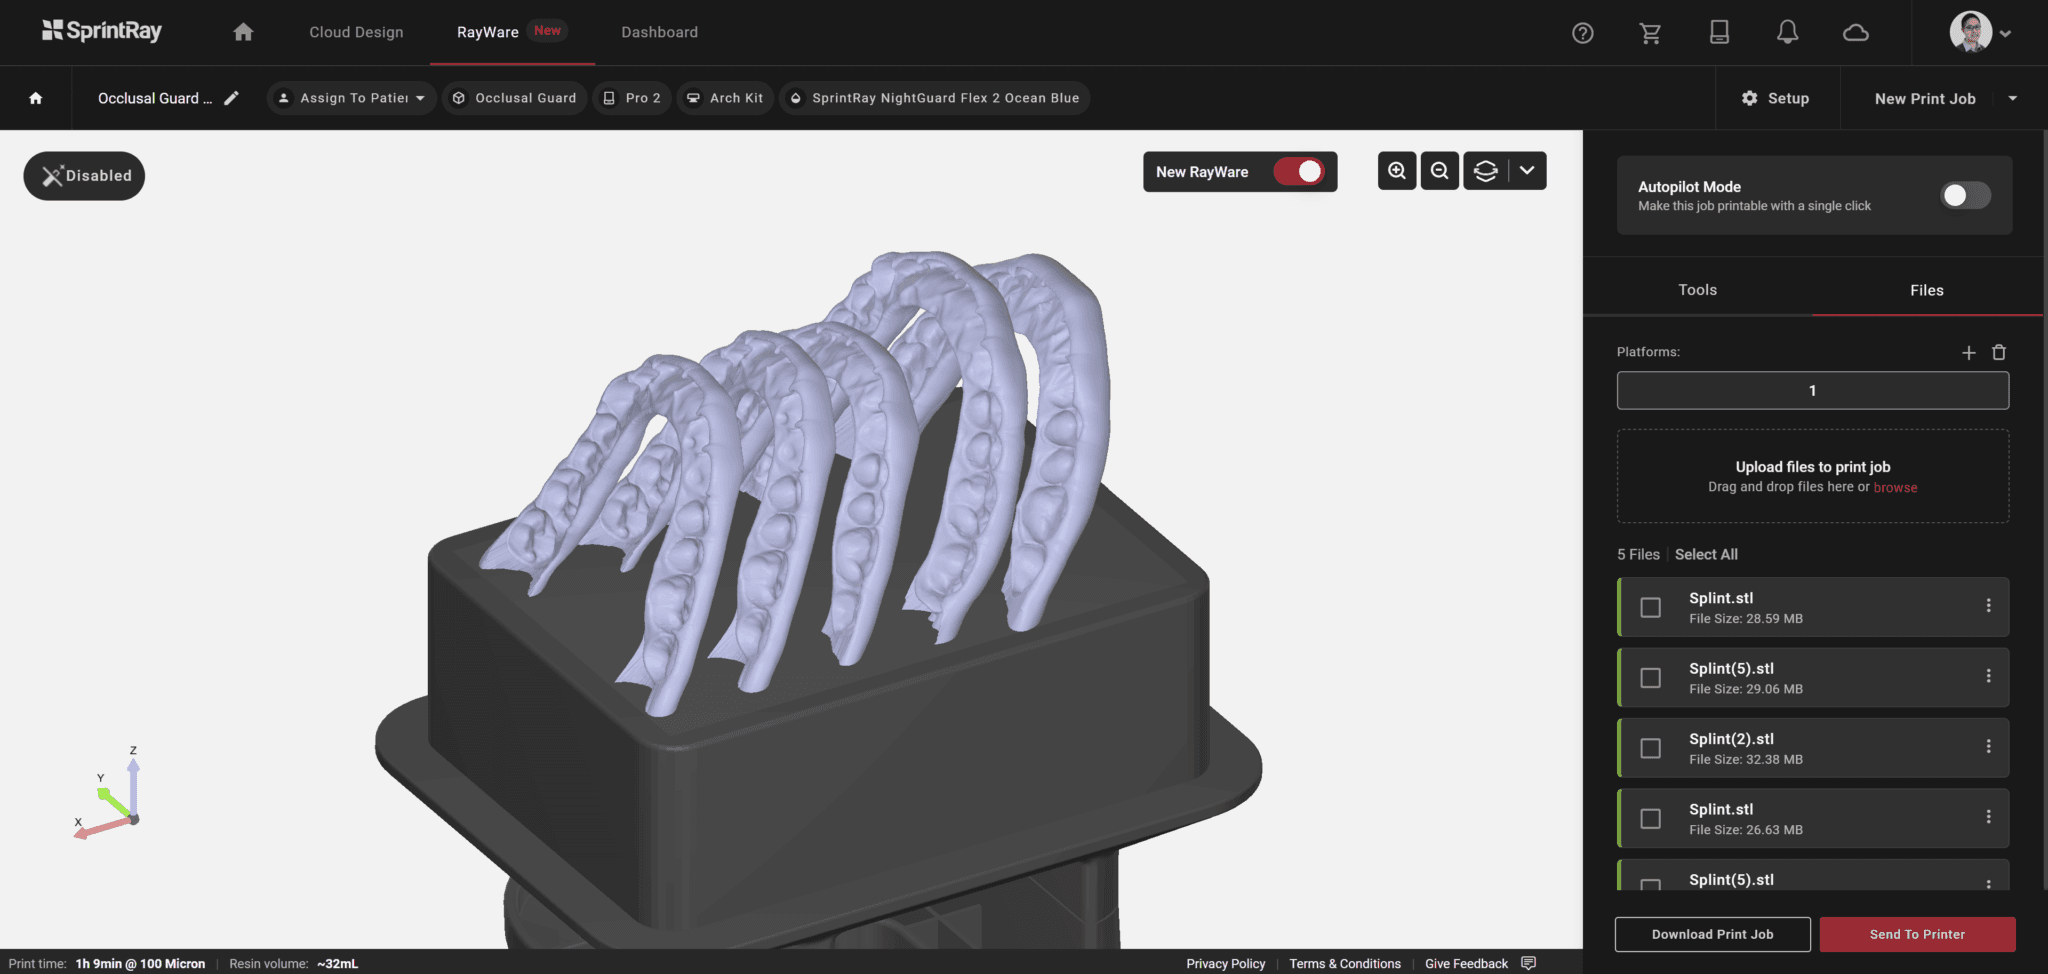
Software
The Sprintray Pro2 uses RayWare Cloud, a cloud-based software. For better or worse, you will need stable and consistent internet connection to fully enjoy the Pro2.
RWC is one of the most user-friendly dental slicers out there so it’s perfect for staff delegation and for the less tech-savvy.
It’s really quite easy to navigate and choose your print settings. For the more experienced, it can be annoyingly dumbed down and there is very little customizability.
For most applications, default orientation and support settings work pretty well. Nightguard and denture base settings work nicely! However, I’ve found for others such as restorations and implant-borne temporaries, default orientation and support placement is still very hit-or-miss. I’d strongly advise against simply trusting the software blindly.
There are very basic CAD functions such as mesh repair and plane cutting but otherwise there are no additional mesh editing tools.
Resin library
Elephant in the room: the resin library accessible to the Pro2 is closed (at least for now), which can be a good thing and a bad thing. It’s good in the sense that we can rest assured Sprintray resins are optimised for their printers, as they’re only dealing with their own materials. As long as you stick to their branded resins, you’ll have the highest chances of print success. However, it does mostly lock you into their system.
The printing experience
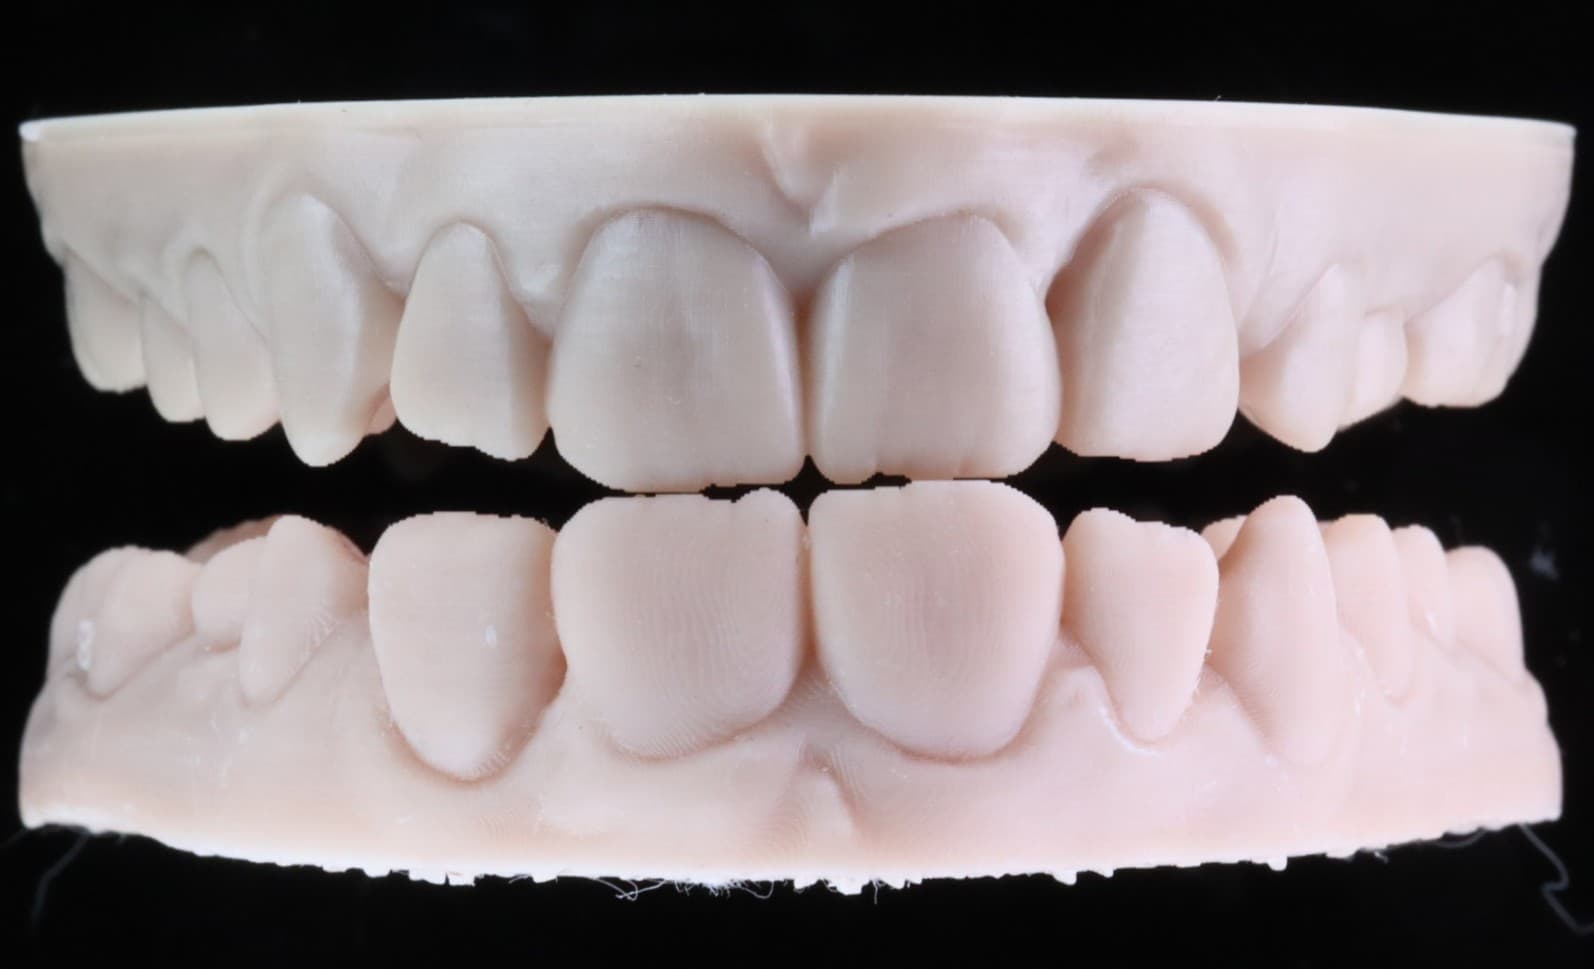
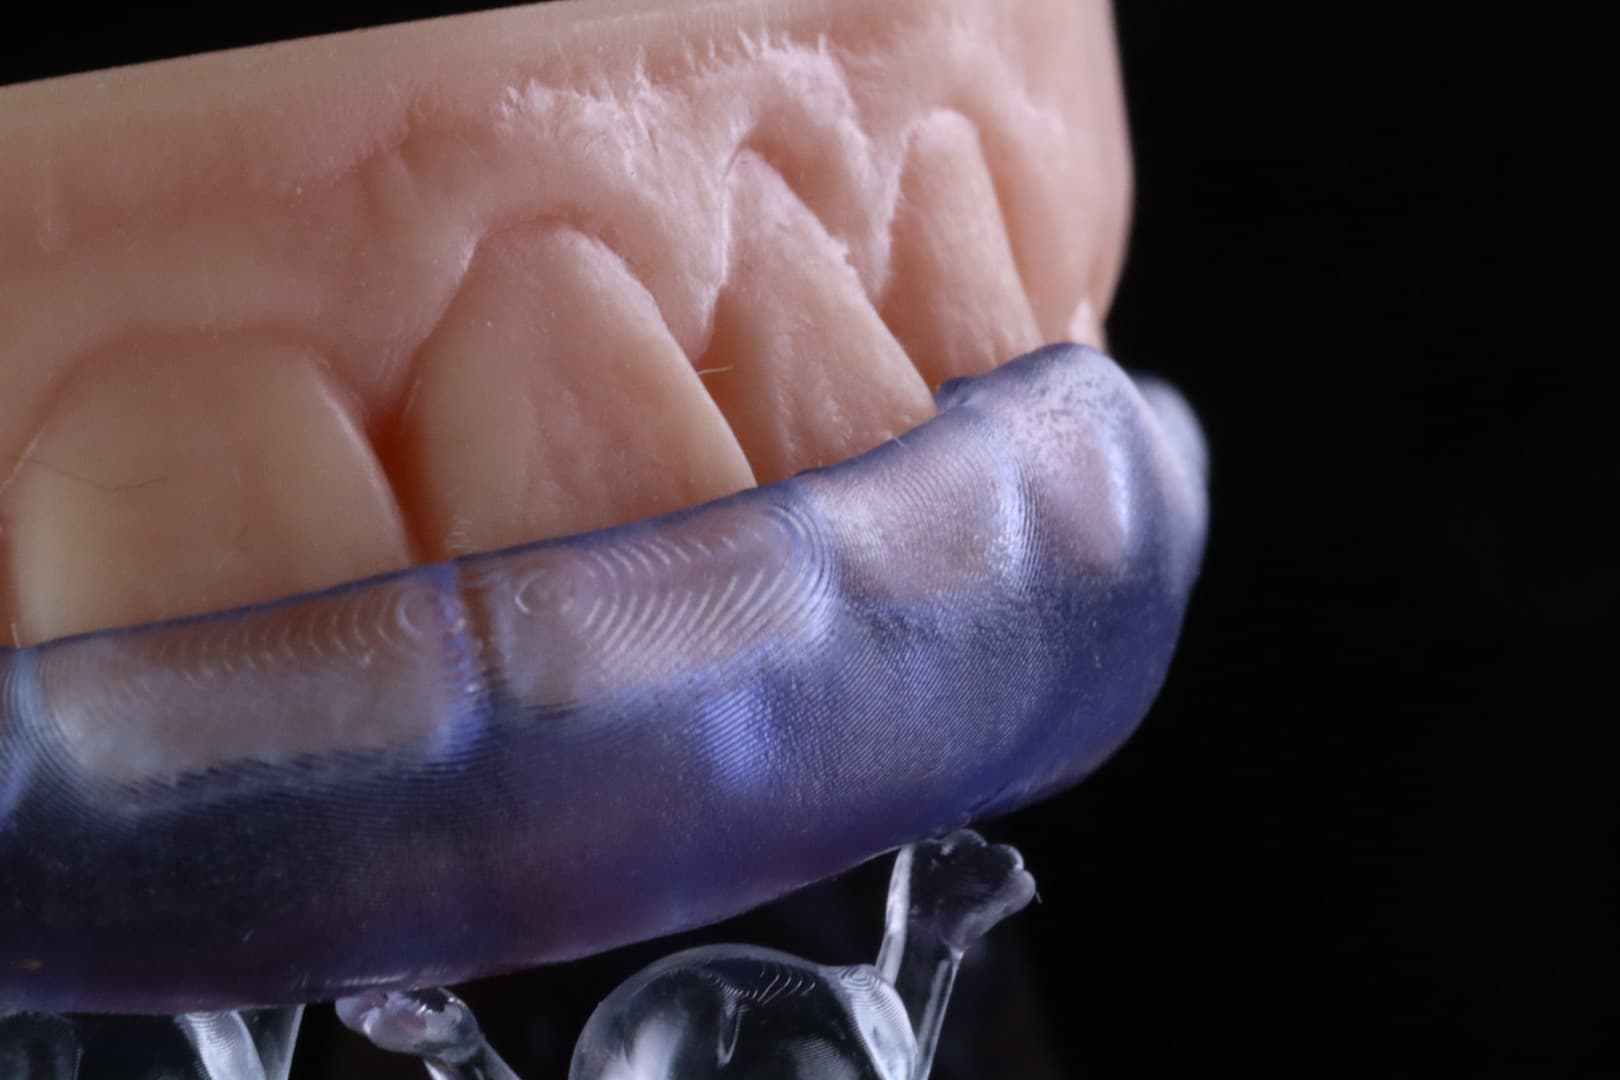
The Pro2 of course comes with industry-standard resin heating – this increases print success, particularly of highly-filled restorative resins which print more predictably when warmed.
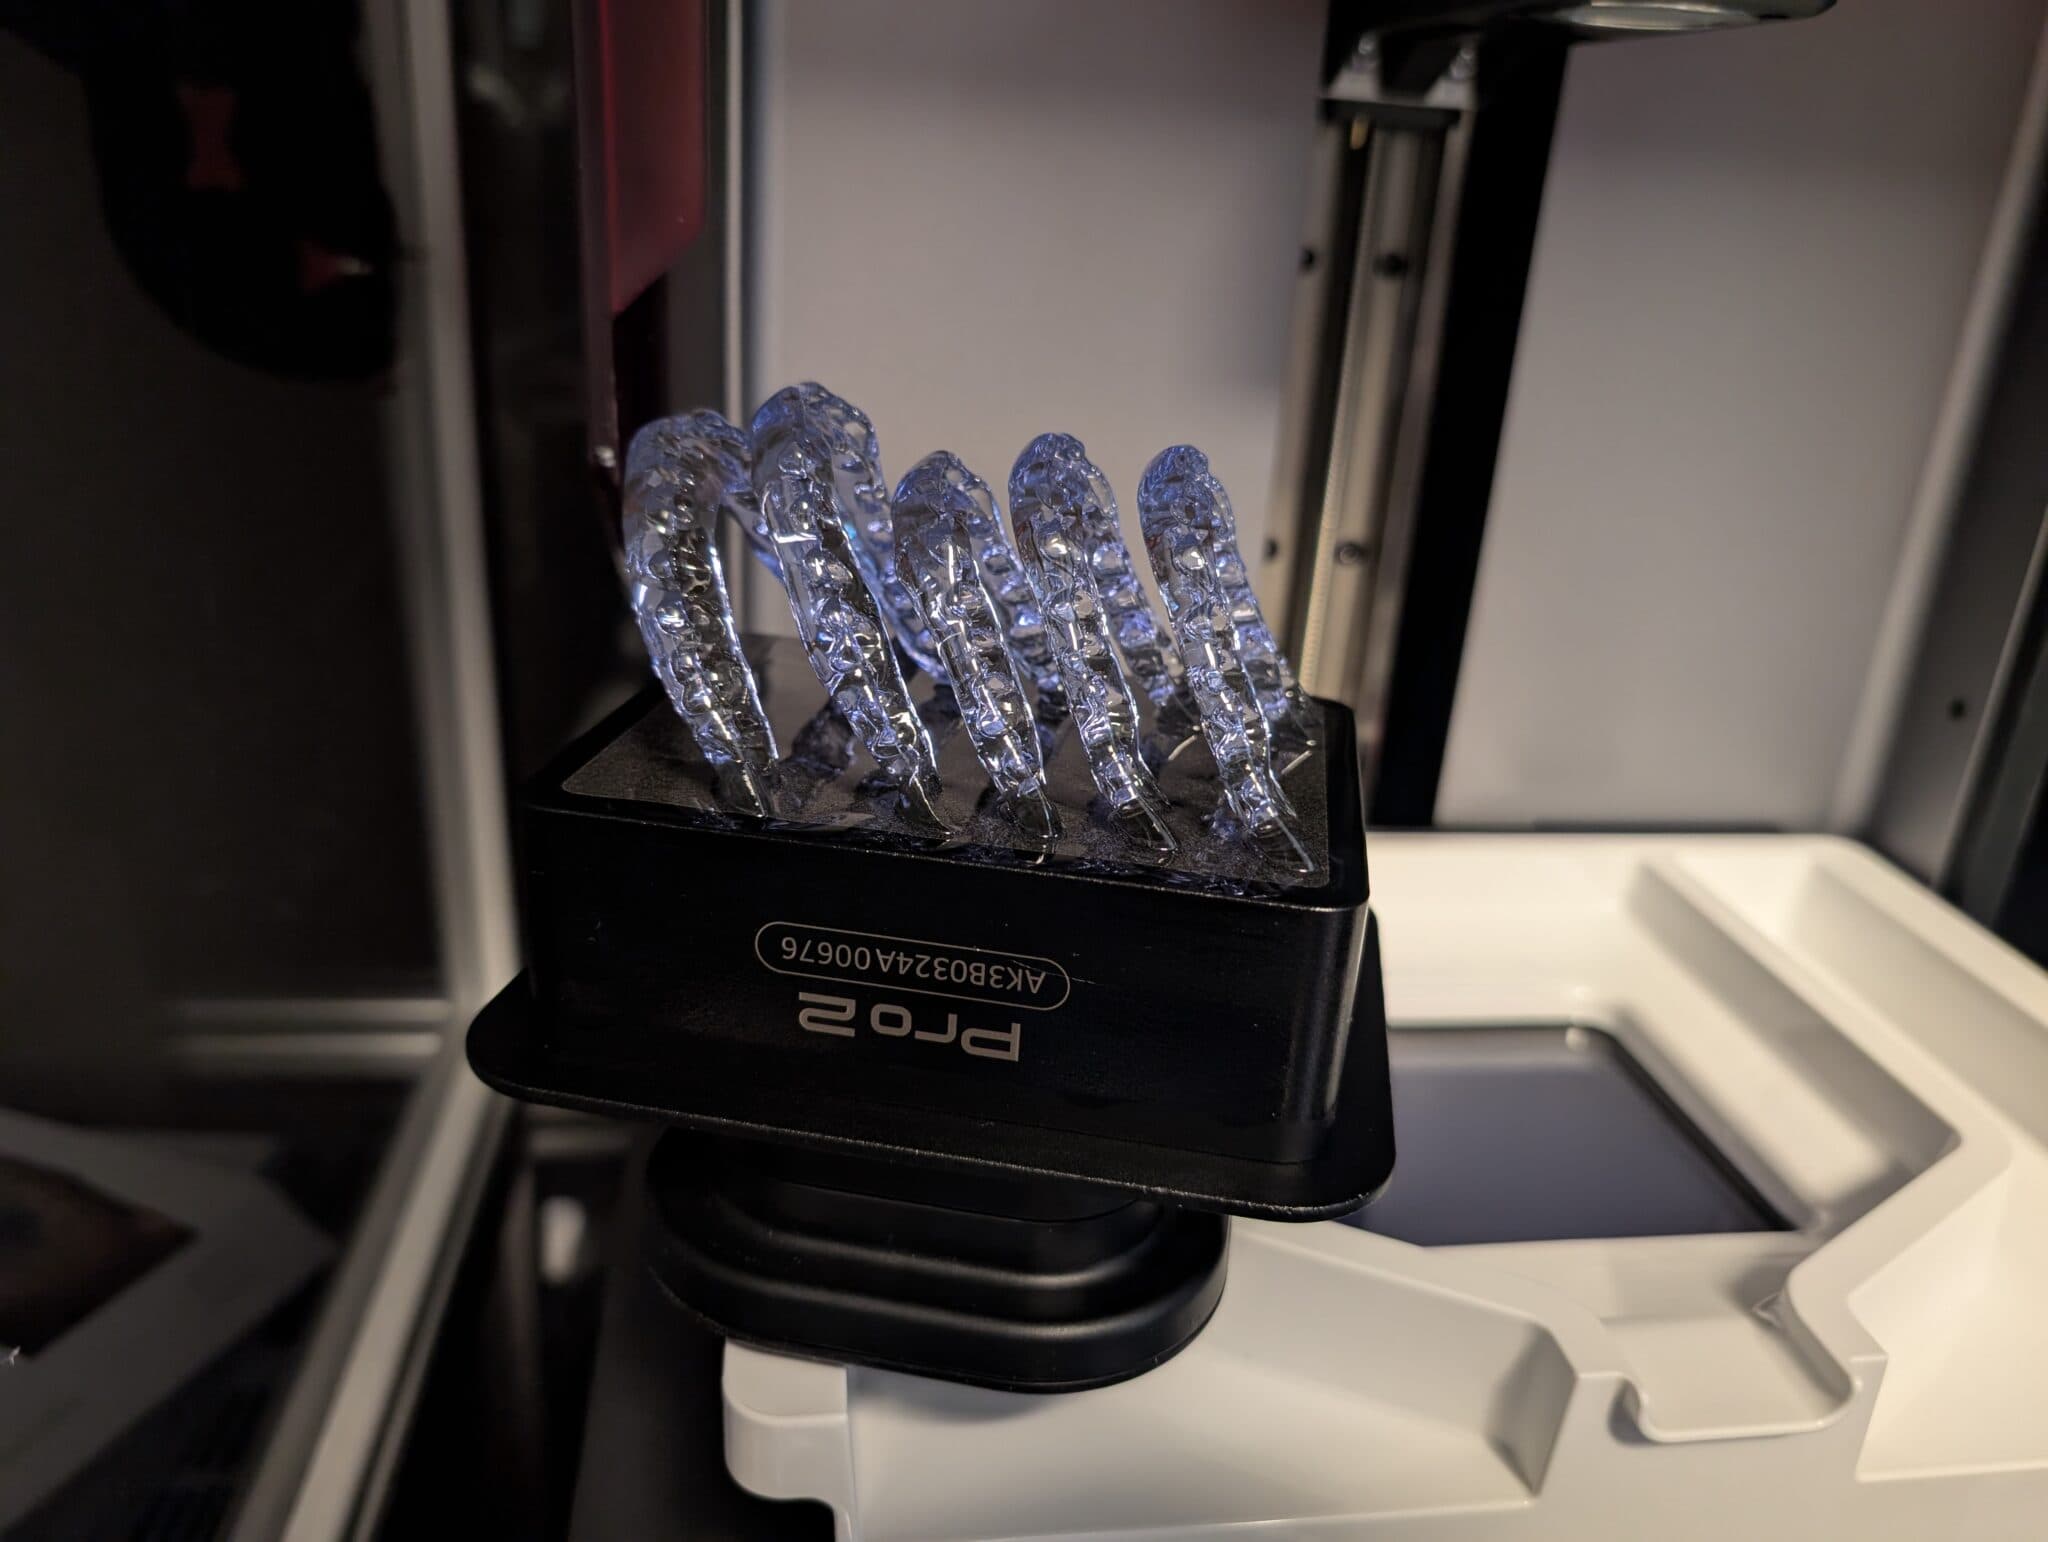
Despite the change in technology utilised, the Pro2 has not sacrificed print duration, which is incredibly surprising, but thoroughly welcome. I can print a nightguard orientated vertically at 100 micron layers out of Nightguard Flex 2 in 60-70 minutes – using an arch kit. Very few printers out there can do the same. Models orientated horizontally and positioned direct to the build plate can take around 25-35 minutes to print at 100 micron layers using Die and Model 2.0 resin on the standard build plate.
The arch kit will boost print speed significantly. Combine that with lightining-fast cure times on the NanoCure. Simply put, there’s no dental 3D printing system out there that does chairside 3d printing as well (besides the new Sprintray Midas).
What is even more welcome news is that the occasional misfits with veneers and crowns I experienced with the S line of printers no longer exist with the Pro2 – truly music to any user’s ears.
I no longer experience slumping around supports for nightguards which I did for the S line of printers. The 385nm wavelength truly seems to be working wonders. I did however find that removing models from the print plate has been abnormally challenging . A minor, yet surprising issue that you wouldn’t expect for the price point.

Conclusion
The Pro2 is an incredible all-round performer which has one of the smoothest workflows out of its competitors. The Pro2 combines the versatility of the Pro95S build plate, with even better accuracy and precision than the 55S. When it works, it’s a smooth and easy-to-delegate experience for most users and it’s setting the benchmark as to what a premium chairside dental 3D printer should be. You just have to keep in mind that it is a closed system and you’re locked into the Sprintray environment.
3 points why you should get it
- Fantastic precision and accuracy over its predecessors
- Workflow is very easy to delegate
- Leading resin development that is more or less unparalleled in the current market
3 points why you shouldn’t get it
- Expensive resins and accessories
- Closed resin library
- Optimised for online-only operation